Monday, October 30, 2006

Nonya Pineapple and Berry tarts

We celebrated our first Diwali at the new apartment with good friends and great food. Here's what I made for this year's Diwali.
I'm sending this as one of my entries for the festive food competition hosted by VKN of My dhaba
[Tagged with: : ].

Pineapple tarts - speciality of Singapore/Malaysia
Berry tarts- my adaptation for those friends who didn't like pineapples.


Ingredients:


For the pineapple and berry jams:

Crushed pineapple in heavy syrup – 2 cans

Sugar - ¼ - ½ cup
Cinnamon ( 1tsp) or nutmeg powder (a pinch)

For the berry jam click here


For the tart base:

3 ½ sticks butter

½ cup icing sugar

2/3 cup (heaped) milk powder

2 eggs (1 of them used for egg-wash)

4 cups flour

2 tbsp vanilla jello pudding powder


Method:

  • Drain canned pineapple and cook with sugar for about 30 minutes, stirring occasionally. Add Cinnamon or nutmeg powder.
  • For the berry jam, cut all berries finely and cook with sugar (no need for cinnamon or nutmeg)
  • Cook until the jams start to leave the sides of the pot. Remove from stove and set aside to cool. If the jam is still chunky, just pulse it for 10 seconds on the food processor.
  • For the tart base, first combine butter at room temperature and 1 egg and beat well.
  • Combine the dry ingredients (sugar, milk powder, flour and pudding powder)
  • Add the dry ingredients slowly into the egg-butter mixture and fold until it forms a smooth, firm dough.
  • Roll out the dough to ½ an inch thickness and with a floral cookie cutter, cut out the pastry dough.
  • Press the middle of the flour with the top of a small bottle cap (to make a slight dent to keep the jam in place)
  • Beat the other egg and add 1 tablespoon on milk or water to prepare the egg wash.
  • Place the cookies on a greased, lined cookie sheet and brush them with egg wash.
  • Bake in a 350°preheated oven 5-7 minutes.
  • Now scoop some of the cooled jam onto the cookie and bake it for 7-10 more minutes.
  • Pineapple and berry tarts are ready!

Up close...


Pineapple and berry tarts

Thursday, October 26, 2006

Jam making's over-rated!!

Did you know how easy it is to make jam?? I just found out recently when I was making jam for the pineapple and strawberry tarts. I've always thought it was a very laborious process, but it is as simple as cutting the fruits finely, adding sugar and lemon juice and cooking for a while. Wham Bam...its done!
If you're planning on using it within the next month, you don't need all the extensive bottling tools.
Without even an iota of knowledge about jam making, I set out to make the fruit filling for the tarts. Lo and behold...I'd made Jam!! (As you can see, I'm pretty excited about this!)


Mixed berry jam

Ingredients for Berry Jam

Strawberries - 1 box
Raspberries - ½ small box
Blue berries - ½ small box
Sugar - ¼ cup
Lemon Juice - 1-2 tsp (depending on the level of tartness you like!)

Method:

  • Cut all the berries and add the lemon juice to them.
  • Add sugar, and cook over medium heat till it reaches the jam consistency!
  • If using pineapples, you could grate the pineapples or use canned pineapples (in juice) and then pulse them in the food processor before bottling.
  • If you love the jelly-like consistency, just add 2 tsp of jello powder in the beginning.
  • Allow to cool and store in a airtight bottle in the refrigerator.
  • Its that simple!

Saturday, October 21, 2006

HAPPY DIWALI!!

Wish you all a very happy and prosperous diwali!!!


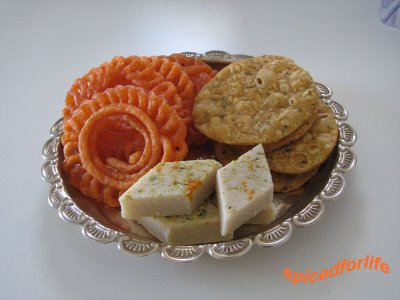
Storebought sweets -Jangiri, Navratan Katli, Methi thattai

Will post pics of homemade sweets later!! - I made Pineapple & berry tarts + Ribbon pakoda...also made Choco jamuns.

For the recipe and pics of pineapple tarts, click here

Sorry guys...no pics of the jamuns and ribbon pakoda. Pakodas got snapped up pretty quickly (will make more soon!). Will make them again and post pics.

Thursday, October 19, 2006

My first Korean - Jap Chae

I've always imagined Korean food to be a lot like chinese food, only more beefier! Maybe it was due to my sheer ignorance or due the scores of Korean BBQ restaurants lining Buford Highway with neon lights flashing the word beef, that I was under this impression. Come to think of it , its strange how I never had Korean food even once in Singapore!! (hmmm....). It wasn't until recently when my advisor thought that since we have a relatively multicultural research group, we should try out restaurants authentic to each person's hometown/country, that I discovered Korean food.

One of the first things that made me happy was...this restaurant we went to, had more than one vegetarian entree. I didnt really believe Yijin when she said that Koreans ate spicy food...until I tried it myself. It was great..just the right amount of spice I liked (I like spicy food!!!). When my order came to the table...it looked very colorful and I felt like I was being served a Korean Thali! There were at least 5-6 sides along with white rice, and I thoroughly enjoyed the flavor of the food. Yijin, my Korean friend then told me, that almost all Korean food can be made vegetarian (yay! more reason to celebrate...)

Anyway, we've been making these plans to teach each other to cook Korean and her favorite palak paneer for a while. Finally last week after one of our classes, we decided to skip the next class (who attends regression course anyway!!) and head to the asian market (H-mart) to gather the necessary ingredients for a Korean meal. She was gonna teach me to make Jap Chae, stir fried vermicelli with mixed vegetables.


Jap Chae (stir fried verm
icelli with mixed vegetables)

It turns out, that a lot of dishes can be made if you have 3 specific sauces - chilli sauce, pepper sauce and soya sauce. Here's a picture of the dish-specific ingredients I bought. In addition to these, I also got a variety of oriental mushrooms to make the Jap Chae. Make sure you get the right noodles to get the perfect taste.


Sweet Potato noodles, Soya Sauce, Sesame Oil, Red
Chili paste


Clockwise - Enoki mushroom (white, long, slender), King Oyster/Trumpet mushroom (a first in my kitchen), and Shiitake mushrooms

I'm told that Jap Chae literally translates to 'various vegetables' and it is a festive dish. Maybe I will submit this as part of the 'Festival foods' virtual food competition. [Tagged with: : ].

***Special thanks to Yijin for translating an authentic Jap-chae recipe (her mum's) from Korean to English, just for me. Thanks Gal!

Ingredients:

Sweet Potato noodles - 300 g
Onion - 1 (100g)
Carrot - ¼- ½
Chives (oriental) or spinach - 100 g
Mushrooms - 200 g
Eggs - 2

For the Jap-Chae sauce:

Minced green onion (scallion) - 2 tsp
Ground garlic - 1 tsp
Soy Sauce - 7 tsp
Sugar - 4 tsp
Sesame oil - 1 tsp
Sesame seeds (white) - 1 tsp
Pepper
Salt

For the marinade for vegetables or meat:

Salt
Pepper
Soya sauce - 1 tbsp
Sugar - 1 tsp
Sesame oil - 1 tsp
Cooking oil - 2 tsp

Method:


Medley of cooked ingredients

  • Boil plenty of water and cook the noodles in it. When the noodles turn transparent, remove from the water and run under cold water. Drain the water thoroughly using a sieve.
  • In a skillet, put the vegetable oil , stir fry the drained noodles and set aside.
  • Wash chives( or spinach) thoroughly and parboil with a pinch of salt for 2 minutes. Once cooked, wash with cold water and drain.
  • Mix the drained chives with a pinch of salt and sesame oil and set aside.
  • Slice onion and stir fry with oil, salt and pepper.
  • Julienne the carrot and stir fry them with oil, salt and pepper.
  • Cut all the mushrooms, marinate them with the mushroom sauce for abt 20 mts and stir fry them.
(By now you must've used up half the utensils in the kitchen!! ) - I did!!

  • Beat eggs, with salt and make an omelette, cooking both sides. Once it cools, cut the omlette into strips.
  • In a big bowl, put together all ingredients except the eggs and mix it with jap-chae sauce.
  • Top it off with sliced eggs and ENJOY with a side of the red-chilli paste!!


Jap-chae served


Tip:

You can use any vegetable, meat, chicken or seafood for this dish. Just pre-cook separately with salt and pepper before mixing together with other ingredients.



Tuesday, October 17, 2006

Tofu Sambal

Siam's (pronounced Shyam) mum makes the world's best Tofu Sambal. She also makes the best mock mutton! Siam is my very close friend from Singapore...way back from good ol' junior college days. Aunty's made tofu sambal specially for me on countless occassions and this recipe is from the pro herself. Tofu sambal is an exceptionally easy, yet yummy dish that's perfect with white rice, by itself or with a rasam. Here's how its made. Special thanks to Siam for reminding me the recipe again!!


Tofu Sambal


Ingredients:

Firm or Extra firm Tofu - 1 pkt
Red onion - 1 medium
Tomato - 1
Tomato paste (optional) - ½ tsp
Ginger-garlic paste - 1 tsp
Chili powder - 1 tsp
Salt (per taste)
Oil for shallow frying the tofu cubes
Soya sauce (optional) - 1tsp
Sugar - ½ tsp


Method:

  1. Cut the tofu to small cubes and shallow fry them till they become crispy outside. Keep aside.
  2. In a pan add 1tsp oil and add the sliced onions
  3. Now add ginger garlic paste and fry till onions cook.
  4. Add salt, soya sauce and chili powder and cook till raw smell goes.
  5. Add the chopped tomatoes and cook them for 2-3 minutes. You can also add peas if you like to make the dish more colorful
  6. Finally add the fried tofu puffs and the sugar and let the onion-tomato mixture coat the tofu thoroughly. Add a quarter cup of water if needed and let the tofu cook in the mixture for the next 5 minutes, in the covered pan.
  7. Garnish with cilantro or start devouring asap!!!

Nasi Lemak with Sayur Lodeh - coconuts galore!

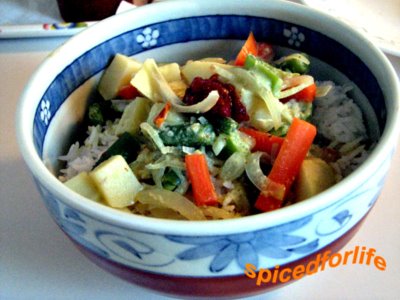
My next post is of dishes from Malaysia and Indonesia. Usually South East Asian cooking is seldom vegetarian, but Sayur Lodeh is an exception. A colorful medly of vegetables are simmered in a light coconut gravy. It is usually taken with steamed rice, but just to give it a twist, we made Nasi Lemak (Malay for rice in fat), or rice cooked in coconut milk. Well, the rice is not wholly cooked in coconut milk, but the milk merely gives a sweet aroma to the rice. A spicy tofu sambal (click here for recipe) will make the perfect complement to this South East Asian delicacy.

Nasi Lemak


The Malays eat Nasi Lemak for breakfast - yes..rice early in the morning. Not just rice, but it is accompanied by boiled eggs, a drumstick of chicken, dried anchovies and peanuts, and cucumber slices. Quite similar to the street food of Mumbai, Nasi Lemak is available in most Malay hawker stalls throughout Singapore and Malaysia during breakfast time. My recipe is predominantly only for the preparation of the rice itself.

Ingredients:

Long grain rice - 1½ cups
Coconut milk - ¾ cup
Cooking oil - 2 tsp (to prevent the rice from sticking together)
Water - 2 cups
Pandan Leaf - 2
Salt - 1- 1½ tsp flat


Method:

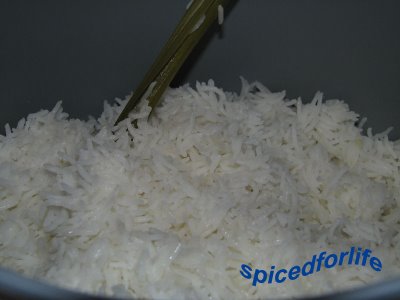
  • Wash rice in cold water and drain. Soak in coconut milk for 10 minutes.
  • Pour 2 tsp of oil in the rice cooker, add the rice and let the oil coat the rice. Now add the water.
  • Clean pandan leaf, tie to a knot and throw this into the cooker with the rice.
  • The fruity essence of the pandan and the nutty flavor of the coconut milk will infuse into the rice.
  • Make sure you switch the rice-cooker to the cook mode (I can't tell you how many times I've forgotten to do this and waited hours for my food to be ready! ) and cook till done!
  • Serve hot with Sayur Lodeh or even Thai Green/Red/Yellow curries.
Sayur Lodeh:


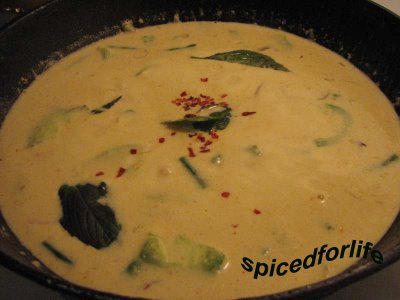
Sayur Lodeh - Simmering

The most important ingredients to this sauce/gravy are coconut milk and the rempah or bumbu spice paste (click here for bumbu recipe). Once you have these and the vegetables cut into 1- inch pieces, the rest is a breeze!!! For the vegetables, feel free to add anything including but not limited to Tofu, beansprouts, bamboo shoots etc.

Ingredients


Potato - 1 medium
Carrot - 1
Green/Red bell pepper - 1
French beans - 5-6
Cabbage - 2-3 layers
Red/yellow onion - 1 medium sliced
Bumbu paste - 2 spoons (add 1 spoon and then add more depending on the level of spice)
Lite coconut milk - 2 cups
Salt - 1-1½ tsp
Oil - 1 tsp
Water - as needed
Thai basil or cilantro for garnishing


Method:

  • Wash all vegetables and cut into 1-inch pieces. Slice the onions.
  • In a fry pan, add oil and when hot, add the onions and the spice paste.
  • Fry till oil separates. Add all the vegetables from hard to soft and fry them in the spice paste.
  • Now add salt and the lite coconut milk. Reduce the heat to a simmer and let it cook for 5-10 minutes. Add water as needed. If adding bean sprouts, put them in now.
  • Finally add thai basil or cilantro to garnish.
  • Serve hot with white rice or nasi lemak.
Try a serving of....


Nasi Lemak with Sayur Lodeh


Sunday, October 15, 2006

Rempah - building block of South East Asian Cooking

The main ingredient to many South East Asian dishes is a spice paste called rempah or bumbu. We don't get ready-made rempah paste in Atlanta, but we are lucky to find the ingredients that make this flavor-packed paste. We generally make the paste from all fresh ingredients, but you can substitute it with dried powders too. All ingredients should be easily available in your local asian market. Galangal is a rhizome that looks like ginger but has a more distinct woody flavor to it. Traditionally rempah also contains shrimp paste, but its been avoided here for obvious reasons! : )

Ingredients:

Shallots -10
6 red chilis (3 fresh, 3 dried)
Lemon Grass powder (available in Asian store) - 1.5 tsp
Galangal - 1 inch piece
Turmeric - 1 tsp flat
Coriander powder - ¾ tsp
Candlenut* or macadamia - 5
Optional (2 tbsp shrimp paste)

* I've read somewhere that candlenuts should not be consumed raw and can upset the stomach. So make sure you add the candlenuts only after all testing/tasting of the paste is done!

Method:

Soak the dried red chilies in warm water for a few minutes and grind all the ingredients to a fine paste with some oil and store upto 6 months in the freezer.

Choc-chip Pancakes for Saturday Brunch!


Saturday's the only time K and I have no morning agendas..and can sleep in late. Invariably, we wake up too late for a breakfast, so end up having a nice heavy brunch. (Of course its a different story that everytime, K starts to get hungry around 2pm and we have a so-called mini-lunch!). Btw, I believe, these 2pm hunger pangs are highly psychological...
Anyway, getting back to the breakfast, K's been asking for pancakes for a while now and I've been making excuses like we don't have pancake mix at home..I'm too lazy...blah blah blah. Last week when we went grocery shopping, he asked me to pick up a packet of pancake mix, which I conveniently forgot. Back home, I tried saving my ass by saying that we could make it from scratch and that'd be a lot more healthy.
Come Saturday morning, surprise surprise...what else would he crave for, but pancakes. Since we didn't have the usual berries to go with the pancakes, we decided on choco-chip pancakes (don't ask me if this is healthy...I don't have an answer!). There are other ingredients we didn't have, but could do without - buttermilk (substituted 2% milk), and baking soda (to make it fluffy).
The end product was yummy, but I don't have any classic pics of stacked pancakes drizzled with maple syrup and topped with a blob of butter...because 'somebody' couldn't wait till one was done to start popping into his mouth! Here's the recipe I got for making 'instant' pancake mix from food network's Alton Brown (yea occassionally he has good recipes!).

Ingredients


6 cups all-purpose flour
1 1/2 teaspoons baking soda
3 teaspoons baking powder (add them to make pancakes fluffy!)
1 tablespoon kosher salt
2 tablespoons sugar

  • Combine all of the ingredients in a lidded container. Shake to mix and use within 3 months.
For the pancakes: (makes about 5)

1 egg, separated
1 cup 2% milk
2 tablespoons melted butter
1 cup "Instant" Pancake Mix, recipe above
1 tsp butter or pan spray, for greasing the pan
20 chocolate chips

  • Heat a frying pan (till water droplets you put on in start dancing the moment they touch the pan). I personally LOVE a cast-iron skillet.
  • Whisk together the egg whites and the milk in a small bowl. In another bowl, whisk the egg yolks with the melted butter.

  • Combine the buttermilk mixture with the egg yolk mixture in a large mixing bowl and whisk together until thoroughly combined. Pour the liquid ingredients on top of the pancake mix. Using a whisk, mix the batter just enough to bring it together. Don't try to work all the lumps out.

  • Lightly butter the griddle. Wipe off thoroughly with a paper towel. (No butter should be visible.)

  • Gently ladle the pancake batter onto the griddle and sprinkle on chocolate chips. When bubbles begin to set around the edges of the pancake and the griddle-side of the cake is golden, gently flip the pancakes. Continue to cook 2 to 3 minutes or until the pancake is set.

  • Serve hot, stacked and drizzled with maple or chocolate syrup.


Chocoate chip pancake

Sunday, October 1, 2006

Paav Bhaji - Mumbai Magic

He're a classic dish from Bombay. Aamchi Mumbai is famous for its bhel, pani puri, shev puri, dahi puri, ragda patties and other chat varieties. My personal favorites have always been paav bhaji from this particular hotel Jayprakash (if I remember the name right) at Chembur, and vada paav from Kunj Vihar in Thane (this one I cannot forget the name!). I'll make an entirely different post dedicated to vada paav, but this one's for paav bhaji.

How do I know so much about Mumbai and Mumbaikaars you ask me? I've spent almost a month every year at Bombay, till I came to the U.S. (I've all my paternal cousins and uncles and aunties in Bombay) . Countless plates of chat and mumbai street food have been consumed at every occassion and its a sheer pleasure to watch the street vendors prepare the bhel or pav bhaji in a jiffy!

In Marathi pav means bread and bhaji means a curry and vegetable mix. The pav is roasted with an ample amount of butter and masala until golden brown, and garnished with diced onion and a slice of lemon and served with the bhaji. The pav bhaji available on hand carts popularly known as Pav bhaji ki Gaadi, on the streets of Mumbai/Pune tastes even better than some of the sit-down restaurants. If you are visiting my site, its highly likely that you've had pav bhaji before, if not you've gotta try this recipe. Its a light meal that's good either as a lunch or a light dinner. This recipe is from a book of fast foods that I have.


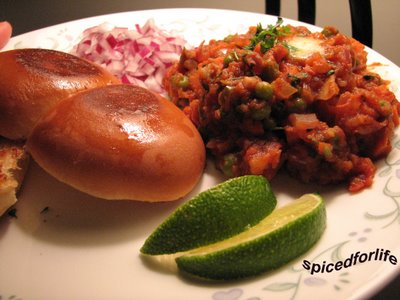
Paav Bhaji with traditional sides - Nimbu (lemon) and Kaandha (onion)


Ingredients
Boiled potatoes - 2big

Boiled mixed vegetables ( I usually prefer just carrots and peas). - 1/2cup
Boil and mash the vegetables coarsely and keep aside.
Tomato Puree - 2 cups
Red Onion chopped very fine - 1 cup
Green chillies - 2-3
Garlic paste - 2tsp
Salt
Pav bhaji masala ( Everest or Badshah) - 2tbsp
Amchur powder
1/2 tsp or lemon juice - 1tsp
Butter 2tsp ( can use salted or unsalted)
oil 2tsp

Dinner rolls (the ones from Publix are good)

For the garnish


butter 2tsp
chopped onions-2tsp
chopped corriander 1/2cup
lemon wedges

Method

  • Heat a kadai,add butter & oil
  • Next add the chopped onions, green chillies, garlic and fry well, till the onions are translucent.
  • Next add the 1/2 of pav bhaji masala and salt and saute for a minute before adding tomatoes.
  • Cook for 2 mins and next stir in the remaining vegetables.
  • Now add 3/4cup of water (I like my bhaji not too thin hence less water. Feel free to add upto half a cup more water) and cook the bhaji until the vegetables are smooth and well cooked .
  • Add the remaining pav bhaji masala, more salt if needed and amchur powder (you could also use lemon juice). Cook for just a minute more.
  • Remove from flame, add the coriander leaves and serve with the garnishes on the side. You can add some more butter if needed.
  • Serve with nice dinner rolls or buns toasted lightly with some butter.