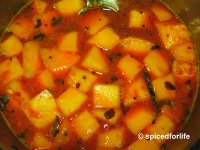
Monday, August 28, 2006

Kozhukattai (Modak) and Sundal

Ganpati Bappa Moriya


On Sunday, we celebrated Ganesha Chathurthi -observed as the birthday of Ganesha - the elephant god. Ganesha or ganpati loves coconuts and modakam - a sweet dumpling made of coconuts and jaggery, so its customary to make modakam on this festive occassion. There are different methods of preparation - some dip the coconut-jaggery nougat in a paste of self-raising flour (maida) and fry it, others make a wrap out of rice flour and steam the dumplings.

The recipe below was taught by my mom. In my opinion, the most difficult part of this recipe is the assembly process - making the cuplike shape. I have helped amma flatten the dough to create the cup on many occassions, but from the looks of it...I still have a long way to go before I can master the shape (afterall this is only my 2nd solo attempt!).

Kozhukattai (Modakam)


Kozhukattai or Modakam - A must on Ganesh Chathurthi


Ingredients
(to make 24 medium size modakams)

For the outer covering (Choppu)
Raw rice -1¼ cups
Seasame Oil - 2 tbsp
Salt - 1¼ tsp flat

For the filling (Poornam)
Grated coconut - 1½ cups
Jaggery - 1½ cups
Cardamom powder - ¼ tsp
Nutmeg powder - a pinch

Method:

For the choppu,
  • Wash and soak raw rice in the ratio (1:2 water) for a couple of hours. Drain the water and keep aside. Grind the raw rice to a smooth batter using this water.
  • Heat the remaining water over a medium flame, in a kadai (a shallow thick bottom vessel). Add salt and a teaspoon of seasame oil.
  • To the boiling water, add the batter and stir continuously without allowing any lumps to form.
  • When the mixture has formed into a smooth thick dough, remove from the fire.
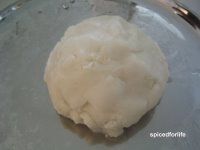
  • Wrap this dough in a wet cotton cloth and steam it well for 15 minutes.
For the filling,
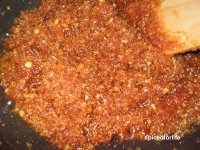
  • Melt the jaggery in a saucepan over a medium low heat. (Add a tsp of water to the jaggery to facilitate the melting)
  • Once melted, the jaggery will start slowly bubbling and form a 'pouring' consistency. Add the grated coconut to a pan and pour the jaggery over it.
  • Slowly incorporate the jaggery into the coconut, over the stove, and stir continously to ensure it doesn't burn.
  • Flavor the filling with powdered cardamom and nutmeg.


The assembly...
  • Smear your hands with a little sesame oil.
  • Smoothen the prepared rice flour dough with your hands.
  • Make small balls (the size of a lemon).
  • Press in palm of hand and slowly flatten the edges with thumbs to get a cup-like shape.

The kozhukattais are not big...my idli plate is small (:P

  • Fill these cups with the prepared coconut-jaggery filling.
  • Close the cups by making small pleats of the wrap covering the filling.
  • Put these filled up cups on an idli-plate and steam them for another 5-10 mts.
  • Modakams ready for feasting.
_____________________________________________________________

Quick Chickpea (Garbanzo bean) Sundal


Sundal has to be the easiest yet most loved festive dish thats made in Indian kitchens. Sundal can be made with a variety of dried beans soaked and pressure cooked before garnishing almost the same way. Traditionally, a different variety of sundal is made every day of the navarathri (9 days). Amma makes chickpea sundal on ganesh chathurthi along with modakams, hence I've followed the tradition. Since I'm a lot lazier, and because I forgot to soak the dried chickpeas the night before, I used canned (look out for the low sodium cans) garbanzo beans for the exact same taste. Here is the simple recipe.


Ingredients:

Chickpeas - 2 cans
Grated coconut - 2 tbsp
Mustard seeds - 1 tsp
Urad dal - ½ tsp
Dried red chillies - 2
Curry leaves - a few
Asafetida - a pinch
Turmeric powder - a pinch
Salt - ½ - 1 tsp

Method:
  • Heat 2 tsp of oil in a kadai and add ingredients 3-7 to the hot oil.
  • Add two cans of washed, drained garbanzo beans, salt and turmeric powder
  • Add the grated coconut and saute for a minute more before serving hot.

Saturday, August 26, 2006

Nasi Goreng...one more from Singapore

Whenever K and I feel homesick....we cook Singaporean fare. The following recipe is a simple, yet one of our most favorite Singapore dish - Nasi Goreng.

Nasi Goreng literally means fried rice. This method of preparation is common in Indonesia, Malaysia and Singapore. Every hawker center in Singapore has at least one Indian Muslim Stall that definitely sells mee goreng (fried noodles) and nasi goreng. Its usually prepared with minced mutton, but you can always get a vegetarian version.


Singapore's Newton Hawker Center at 2am!

Nasi Goreng


Nasi Goreng topped with 'bulls-eye' egg and ketchup


Ingredients

Rice - 2 cups (cook)
Chopped green chillies - 2 -3
Freshly ground red chili paste or 'sambal olek' sauce - 2 tbsp
Tomato sauce
Smart ground original veggie protein crumbles - 1/2 cup (in place of minced mutton)
Quartered tomatoes - 2

Boiled and diced potatoes - 2
Sliced onion - 1
Bean sprouts - 1/4 cup
Finely sliced cabbage - a few pieces
Eggs - 2 - 3
Msg (optional)
Palm sugar - 1 - 2 tsp
Turmeric powder - a pinch
Salt - to taste

Method:

  • Heat 2 tbsp oil and fry the onions till golden brown
  • Add the red chili paste and the turmeric powder
  • Throw in the protein crumbles, tomatoes, cabbage, potatoes and stirfry on high heat
  • Add salt and sugar
  • Next add the cooked rice, green chili, beans sprouts and let it cook on medium heat for 5 mins
  • In the center of your tava/wok, add 1 tsp oil, break the eggs, scramble and mix with rice thoroughly
  • Serve with sliced cucumber and tomato ketchup
  • Best eaten with teh-ccino

Thursday, August 24, 2006

From the Hyderabadi kitchen

All dishes in this post are courtesy Murali's kitchen. The first guest post of this blog!
Mu recently shifted his abode...so we had a housewarming dinner on Monday night..Can't believe he cooked all this in 2 hours! Thanks Mu...for the awesome food and the recipes!

On the Menu....

Vegetable Manchurian


Vegetable Manchurian - one more from the fusion genre

Ingredients

1 cup - Cabbage
1 cup - Onion
1 Cup - carrot
1 Cup - Maida
1/2 cup - Corn flour
5 Green Chillies
1/4 cup Coriander leaves

For Frying:
4 tsp Garlic(Cut in to small pieces)
4 tsp Ginger(Cut in to small pieces)
1 small onion(Cut in to small pieces)
2 green chillies(Cut in to small pieces)
2 tbs Soya sauce
1/4 tsp Ajinomoto salt (can be omitted)
Salt to taste
Oil to fry

Process

Slice/Chop cabbage ,onion, carrot and cilantro in to very small pieces. Finely chop green
chillies.
In a bowl, mix maida, cornflour, cabbage, green chillies, onion, carrot, salt and coriander leaves.. Heat oil in a pan. Now take small amounts of the mixture, make into small balls and fry in oil until they become golden brown.
After frying heat 2tbs of oil in a kadai, add ginger, garlic, onion and green chilli when they are fried add ajinomoto salt, soya sauce and 1/4 cup of water.
When the sauce begins to boil, add the small balls(manchuria) and fry until the water evaporates.
Veg-Manchuria are done... Serve hot with tomato ketchup...
________________________________________________________________

Guthi Vankaya Koora


Guthi Vankaya Koora - stuffed indian eggplant in a tangy sauce

Ingredients

6 medium size brinjals (leave the stem on)
2 big onions
1 tbsp spoon garlic paste
3 tbsp spoons sesame seeds
4 tbsp spoons cococnut powder
1 handful groundnuts
1 handful cashewnuts
paprika powder
turmeric
salt to taste

Process

Dry roast the sesame seeds and the coconut powder seperately(without oil) in a saucepan just for 2 to three minutes in low flame then fry the cashewnuts and groundnuts seperately in oil for two minutes. Grind all the above into a coarse powder.

Now make a smooth paste of onions and garlic, with salt, paprika and a pinch of turmeric.
Add the above ground powder to this paste.

Take the brinjals, invert them and at the base make 4 slits on each side, leading 3/4 way towards the stem(leave the stem on).

Now stuff them with the masala mixture and saute them in the oil along with the remaining masala and some water, until they are cooked soft.

Serve hot with rice
___________________________________________________________________

And for dessert... sinfully delicious Double ka Meeta


Double ka Meeta - not for the calorie conscious!!!

1 Loaf of Bread
1 litre Milk
500gms Sugar
250gms Double Cream
250gms Pure Ghee
100gms Chopped and Roasted Cashew Nuts
100gms Almonds (soaked and chopped)
10gm Saffron
5 Cardamom powdered

Method

Cut each bread slice into four pieces. Fry them in clarified butter till golden brown and crisp (you can substitute this with oil flavored with butter)

Make a sugar syrup by adding half a litre of water to the sugar and boil it for 15 minutes. Add the powdered cardamom and the saffron dissolved in milk to the sugar syrup.

Boil milk until it is thick.

Arrange the fried bread pieces on a flat tray and sprinkle the chopped nuts on
them.

Pour the sugar syrup, double cream and milk alternately over the bread pieces while they are still hot.

Refrigerate and serve as dessert.

Tuesday, August 22, 2006

Pizza Maharaja - Paneer tikka pizza

In line with our theme of fusion-weekend, we made paneer tikka pizza for Sunday lunch. Yummy paneer tikka masala over a store-bought pizza dough...all topped with cheese...and pronto...the Pizza Maharaja was ready!

Paneer tikka pizza


Ingredients :

Pillsbury Ready Crust Pizza - 1
Paneer - ½ slab (cubed)
A good paneer tikka masala recipe (make sure the masala is not watery and in a spreadable consistency)
Grated mozzarella
Parmesan cheese
Chilli/Red pepper flakes
Coriander leaves for garnishing

Method

  • Make your paneer tikka masala/paneer butter masala as required (use tomato paste instead of chopped tomatoes)
  • Preheat the oven to 400º F
  • Assemble your pizza thus - Lay out the base, spread the paneer tikka masala, sprinkle dried parsley flakes and top it off with mozzarella cheese
Under construction....


  • Bake in oven at 400ºF for 12-15 mts
  • Remove from oven and top with red pepper flakes and coriander leaves
  • Sprinkle some parmesan if required
  • Enjoy!

Close up...of final product

Monday, August 21, 2006

Pan Fried Chilli Paneer

It was fusion weekend at our kitchen! After a blissful saturday nap, as I made chai, K started craving for the Pan fried chilli paneer at Bamboo Garden. The restaurant has an Indo-Chinese or Indianized-Chinese menu. I'm not too sure of the origins of this cuisine, but my first encounter with this was at Bombay when I was a kid visiting cousins. The street vendors/ hawkers made such delicious hakka/ schezuan noodles and gobi manchurian. As someone put it..it's a perfect blend of noodles from China and spices from India.

OK...Coming back to my story, once K mentioned Pan fried chilli paneer...I HAD to have it then and there. Simply because I just LOVEEE this appetizer item on the menu and have created a loyal fan following for the same. This evening, we tried to recreate that magical taste, altho we were missing green bell pepper, an essential ingredient (substituting with yellow was not a bad idea).
We started off with no recipe to refer to, but our memory of the taste. The end product was very very close to the original, and I'm sure we'll perfect it at the next attempt.

Pan-fried Chilli Paneer


Ingredients


Paneer (indian cottage cheese) - ½ slab
Onion - ½ sliced
Garlic - 4 pods chopped finely
Ginger - 1 inch piece julienned
Red and Green Chilli - 4 nos chopped
Green bell pepper - ½ sliced
Corn Starch - 2 tbsp
Ground Black Pepper - ¼ tsp
Soya Sauce - 2 tsp
Salt
Sugar - a pinch
Oil for shallow frying - 2-3 tbsp
Chopped Spring Onions for garnishing

Method
  • Cut Paneer into rectangles.
  • Prepare a light cornstarch mixture by adding water and a pinch of salt.
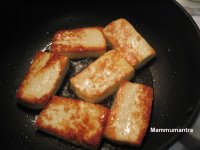
  • Drench the paneer rectangles in the cornstarch mixture and shallow fry them in a pan until golden brown. Set aside.
  • Add a tsp of oil to a hot wok, and throw in the onions, ginger, garlic and red and green chillies.
  • Add salt and soya sauce.
  • Once the veges start sizzling, add the green bell pepper and cook for half a min
  • Add a tsp of the remaining cornstarch and a pinch of sugar
  • Add the fried paneer cubes and let it sit for half a min more.
  • Garnish with chopped spring onions and serve hot.


Mirchi Ka Salan and a Movie

The start to the weekend was almost perfect. Started early with a fabulous potluck dinner at KS and Sumi's place. The paneer king (aka KS) had prepared a vegetable biryani..hyderabadi style. Guess who gave him the recipe K...haha (you must have seen the proud look K had when on fone with him!) It was a vegetarian version of K's egg biryani (will make the post the next time he makes it!). We made mirchi ka salan in true hyderabadi fashion. Thanks Mu for introducing us to the nawabi khana.


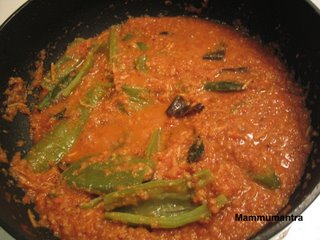
Mirchi Ka Salan - Blanched green chillies in a spicy/tangy sauce
goes very well with Rotis and Biryani's alike
Recipe from Saroj's Cookbook of Bawarchi


Dessert was a marble-slab style mix of pineapple-coconut and chocolate-chocolate chip on a wafer cone... truly yumm... (will post pics)

Friday night Mu dragged us to a Telugu movie without subtitles..Bommarillu. Suprisingly I followed almost 70% of the movie (maybe cos the lead actor was a tam speaking telugu -Siddharth)....anyway all 3 of us loved the movie. It was clean entertainer...with simple story line. What a contrast to the over hyped and torturous Kabhi Alvida Na Kehna. No I didn't make the mistake of watching the movie. I merely heard a horrifying account of my friend's experience watching the movie and my faith in Karan Johar's incapability as a director is reaffirmed. As I told my friend, I realized that my dislike for Karan Johar, Shah Rukh and Preity Zinta put together is many more times than my liking for Abhishek and Rani. Sorry guys....but who asked you to act under his direction??

Wednesday, August 16, 2006

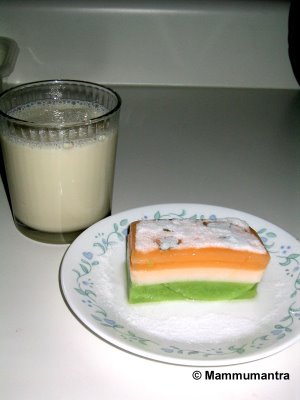
Tricolor Agar Agar


Two days back, India celebrated its 59th Independence day. What better way to celebrate, than with something sweet! I made a tricolor agar agar.

Agar-agar is Malay for jelly. The thickening agent used here is a powder, derived from seaweed. Agar as it is called, is a vegetarian substitute for gelatin. When dissolved in hot water and cooled, agar becomes gelatinous.

It is available as a powder, as a stick (kanten in Japanese), and also as fine, crinkly strands (somewhat like seaweed for sushi, but only colorless and translucent). We got this powder from our local asian store.

I'm sending this recipes as part of the festive cuisine virtual competition hosted by My dhaba.
[Tagged with: : ]

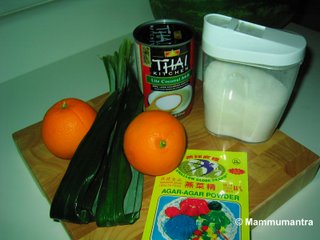
Ingredients


Essence removed from
pandan leaves for the green color.
Orange food coloring or orange agar agar powder and orange juice.
Lite Coconut milk
Sugar


Method of preparation

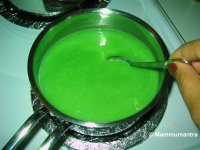
Add pandan essence, lite coconut milk (¼ cup) and 2 tbsp of sugar (or substitute) to 350 ml of water and bring to slight boil. Add 1½ tsp of agar-agar powder and stir until it dissolves.
Pour the liquid into the mould and leave in the refrigerator for ½ hr to set.
Repeat the process with other 2 layers with different colors.

* Traditionally agar agar tastes good when coconut milk is added.


Our teatime snack - agar agar and soya milk

Monday, August 14, 2006

Spaghetti squash with oven roasted tomatoes

K and I do our weekly grocery shopping from the Farmers Market at Dekalb. The produce section of the market offers hundreds of varieties of vegetables from around the world.
Recently, we decided to buy one never-before-tried vegetable every trip we make to the market.
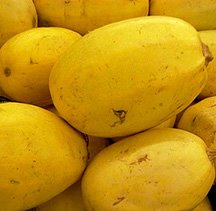
We've started with Spaghetti squash. We had no clue how to cook it or for that matter what it looked like even! I must admit, the final product was just too awesome. And if you didn't know (like us), you don't need spaghetti to cook this pasta. The fruit is unique..once cooked, it can be seperated into spaghetti-like strands with a fork.


For more about the vegetable, click here.


Spaghetti squash


Spaghetti squash with oven roasted tomatoes


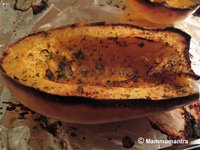
  • Cut the squash and remove the seeds (The fruit is very hard and woody when raw, so be sure to get a sharp knife!)
  • Slice the Roma tomatoes
  • Hit the squash and tomatoes with olive oil, salt, pepper and italian spices (dried parsley, thyme, oregano)
  • Preheat the oven to 375ºF and bake the squash (facing down) and tomatoes for 40-50 mts (I did it for 50 mts and the sides were slightly burnt but with no damage to the taste). You could remove the tomatoes slighly earlier.


  • In a seperate pan, add olive oil, minced garlic, and some red pepper flakes
  • Once cooked, add the oven roasted tomatoes, add salt and sauté.
  • Remove spaghetti-like squash strands with a fork and add it to the pan.


  • Toss the strands with the tomatoes and add a chiffonnade of basil (you can add a spoon of basil pesto too!)
  • Savor the sweet taste of the squash with the concentrated flavor of tomatoes. Will truly make for an interesting and easy meal!
Spaghetti squash with oven roasted tomatoes.

Sunday, August 13, 2006

Thé-cino - Tea with a twist

Thé (teh) in Malay means tea. K has been excited about his newly acquired baby - an espresso maker. Countless espressos have been made and consumed over the past few days...all in the name of getting that perfect crema. I'm not really a coffee person (with the exception of mocha frap), so this evening we decided to have tea - not usual Indian tea....but tea with a twist. Of course K insisted on using the milk steamer/frother feature of the espresso maker!!
We made teh-cino - sweet tea topped with steamed milk and froth, flavored with a dash of cinnamon!


Teh-cino


This is how we made it...


Reminded us of the teh-cinos we used to have at Jln Kayu (Singapore) roti prata stalls. A perfect end to a meal of roti pratas and curry (Sigh!)

Friday, August 11, 2006

Vathakuzhambu / Vatralkuzhambu

Onion Vathakuzambu with potato kari (somewhere between sautéed and shallowfried) has to be at the top of my comfort foods list of all times. The sweetness of the red onion (big one!) complements the sour taste of the tamarind and the spice of the sambhar powder. Vathakuzhambu is also a perfect substitute for pickle. I remember when I was little, my grandmom used to thumb a little hole in the middle of one scoop of yoghurt rice and fill it with a dollop of vathakuzhambu. We cousins would try to imitate her way of eating, and giggle away.


Vathakuzhambu

Can be prepared with one of the following vegetables.
Garlic, Onion, Okra (Ladies finger), Cluster beans (Kothavaranga), Avaraikai, Sunberry (Manathakali), Drumstick, White Radish, pumpkin and even fried Appalam.

Other ingredients

Sambhar powder* - 2tsp. heaped (recipe below)
Tamarind
paste - 1 tsp flat
Mustard seeds
- 1 tsp.
Fenugreek seeds
- ¼ tsp.
Tuar dal
- ½ tsp.

Oil
(sesame) - 2 tbsp.
Curry leaves and Asafoetida for garnishing.
Jaggery (optional)

Salt to taste

  • Add the tamarind paste to 1 cup of warm water and set aside.
  • Heat oil and add mustard seeds. Once they splutter, add fenugreek seeds and tuar dal.
  • Add curry leaves and asafoetida (hing).
  • Now add the vegetable (cut bite sized or cubed) and once sautéed add the sambhar powder and fry.
  • Simmer and add the tamarind pulp, salt and let it boil.
  • Let it boil until it cooks. If using appalam, add it when curry is ¾ done.
  • Add 1/2 tsp of jaggery if using any vegetable other than red onion or pumpkin.
  • When the oil separates on top, and the gravy reaches a syrup-like consistency the vathakuzhambu is ready!

Sambhar Powder recipe*

Coriander seeds - 250 gm
Dried Red Chilli - 200 gm
Peppercorn - 100 gm
Tuar dal - 100 gm
Chana dal - 100 gm
Fenugreek seeds- 50 gm
Turmeric - 2 tblsp


Dry roast all above separately and grind to a fine powder. For long term storage, refrigerate.

Humble beginnings


Hey there...welcome to Spiced for life. . This is mostly a food blog inspired by fellow foodies on the net, the likes of Mahanandi and Salt and Pepper.

My husband Kartik and I are both steadfast foodies and as luck would have it..we are surrounded by fellow food lovers. We love experimenting different cuisines and typically our repetoire consists of South/North Indian, Chinese, Italian, Thai, Malaysian and Singaporean fares...but we're trying to expand our horizons (within limits of vegetarianism of course!). Hope you enjoy reading our escapades with food!

South Indian Cooking 101

After wondering a while on a good starting point, I have decided to start close to my heart. Home cooked South Indian meals..more specifically mouth watering tamil vegetarian fare that amma makes. Sambhar, rasam, vathakuzhambu, morekuzhambu, porichakuzhambu , porichakootu (aka milagootal by the palakkad-influenced!), kari...the list is endless. Each of these items has at least 2-3 ways of preparing them and the permutations and combinations lead to endless possibilities. For instance, sambhar can be prepared normally with tuar dhal (thuvaram paruppu), or by adding masoor dhal (the orange variety of dhal). You can have an araichuvitta (with coconut) sambhar or a varutharaicha (powdered roasted spices added) sambhar. Then there is sambhar thats prepared as an accompaniment to idly, vadai , dosai and the likes.

For those who are not very familiar with South Indian food, at home, a weekend lunch would consist of white rice with sambhar or some kuzhambu (gravy), along with one kari (sautéed vegetables) and one kootu (veges in a semi-gravy) followed by rasam with white rice and finally rice plain yoghurt with a side of some pickle. Deep fried appalaam (or pappad) was served with sambhar. On festive occassions, a dessert (payasam or kheer) would be served.

Eating south indian food is as much a science as cooking it. The perfect combinations of kuzhambus and karis enhance one's dining experience. For instance, vathakuzhambus taste better with karis of certain vegetables - potato, okra(ladies finger), french beans, but not as good with Cabbage or Eggplant. However, cabbage prepared in a semi-gravy form (kootu) tastes good with vathakuzhambu. Confusing?? well, you'll get the hang of it in no time!


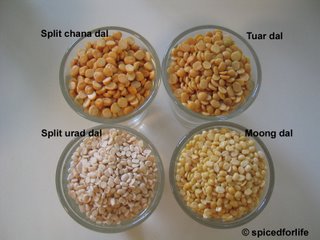
Spices and Dals (Paruppus) used in everyday cooking


* pics dedicated to Siam... i know its kinda late..but i've kept my promise of making u a scrapbook of spices...albeit online!